Scan text with Kooka or xscanimage.
Use gocr to recognize characters and text.
Remark: When clicking is mentioned, in general clicking with your left mouse button is meant.
Be sure that your scanner is connected, switched on and ready for use before you boot Knoppix. Furthermore, your scanner must be recognized by Knoppix, as described in Lesson 2.
Put something to scan on your scanner.
| |
Click at the Knoppix-KDE-Desktop at the bottom left on the symbol with character "K". |
| |
Click in the menu that opened at the entry "Multimedia". |
| |
Click in the sub menu that opened at the entry "Graphics". |
| |
Click in the sub menu that opened at the entry "Kooka (Scan & OCR Program)". |
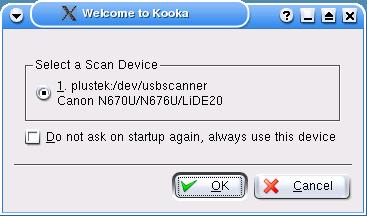 |
Select in the Remark: When you do not see this window, then the scanner is probably not recognized. Is this so, test the scanner as showed to you in Lesson 2. |
Now you see the "Kooka" window:
 |
Scanning an image and saving it as an image file
|
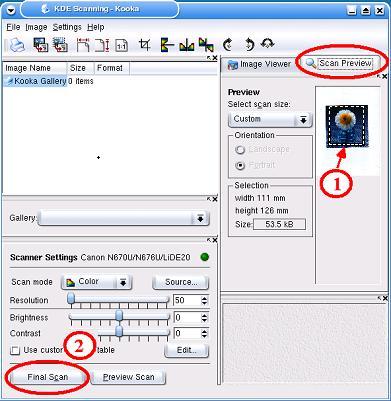 |
Top right in the "Scan Preview" pane, a preview of the image
is shown. This preview is meant to be used for the setting of the scan
limits and helps to determine the settings of the Gamma, Illumination
and Contrast. (1) With the left mouse button pressed and drawing a selection rectangle, you can mark in the preview picture which region actually need to be scanned, (2) Click on
|
You are asked in the new opening "Kooka Save Assistent" window,
in which format you want to store the image. Select a format (e.g. PNG)
and click on
 |
Top right, in the pane
"Image Viewer" (and below it right) the scanned image is shown.
(1) With mouse clicks on the
symbols on the tools list you can now crop the image, or mirror it,
rotate it, etc. (2) With a click on the menu item "File" and then on "Save Image" you can store the image in a file. |
Beware: When you click in the "Kooka" window top right at Help and then on "Kooka Handbook" you - sorry - get an old version of the manual.
| |
You end Kooka by clicking on the "X" symbol in the window top right. |
[Back to the beginning of the page]
This program is described in Lesson 2 .
[Back to the beginning of the page]
Take care : Starting gocr from within the program Kooka using the tool list entries "OCR Image" or "OCR on Selection" does not work.
That's why you have to do this:
Scan your text with Kooka or xscanimage and save the text in an image file (e.g. in the file bookpage_1.ppm in the directory /home/knoppix).
![]() Click on the console icon at the bottom left in the
control list. This opens a console (command window), type here
the following command:
Click on the console icon at the bottom left in the
control list. This opens a console (command window), type here
the following command:
The file bookpage_1.txt is then translated from pixels into text and stored in the directory /home/knoppix under the same name. You can read the contents of the file by using Konqueror.
[Back to the beginning of the page]